Updating a Published Add-On
Publishing functionality described in this article is temporarily available for free assets only.
Only perfection needs no room for improvement. Unless this is your case, you might want to update your add-on. Here’s how this should be done:
- Open UnigineEditor and create a package that represents an updated version of your add-on. This package should contain the complete add-on, not just the parts you want to add.
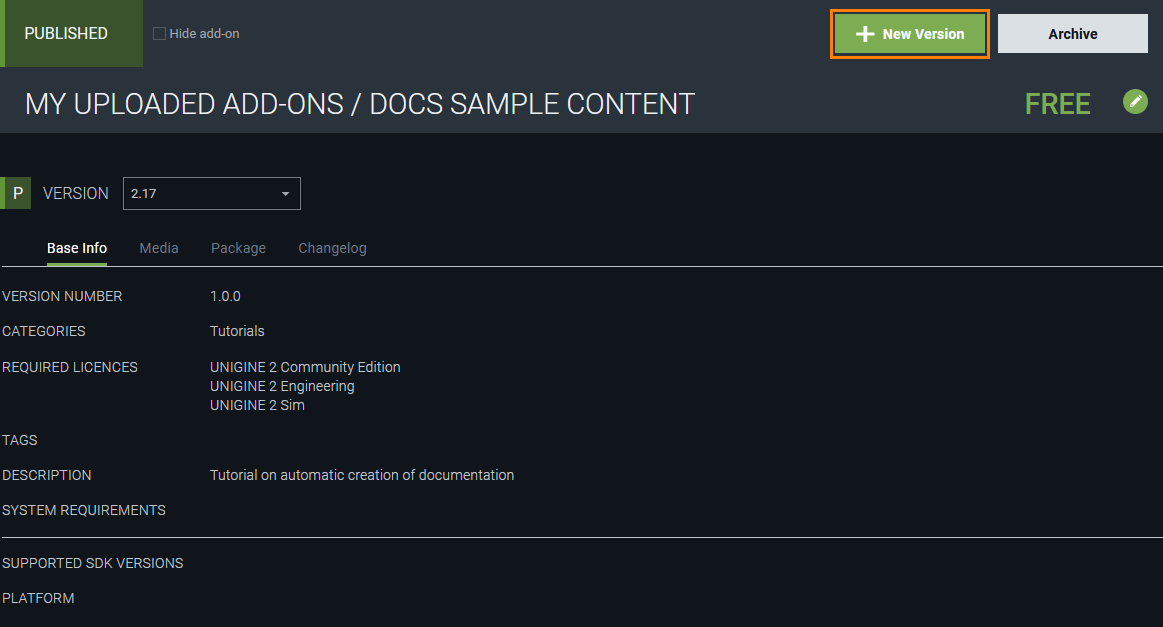
- Go to Add-On Store and log in using your credentials. In Publisher Workspace, select the published add-on that you want to update.
-
Click +New Version to add a new version of your add-on.

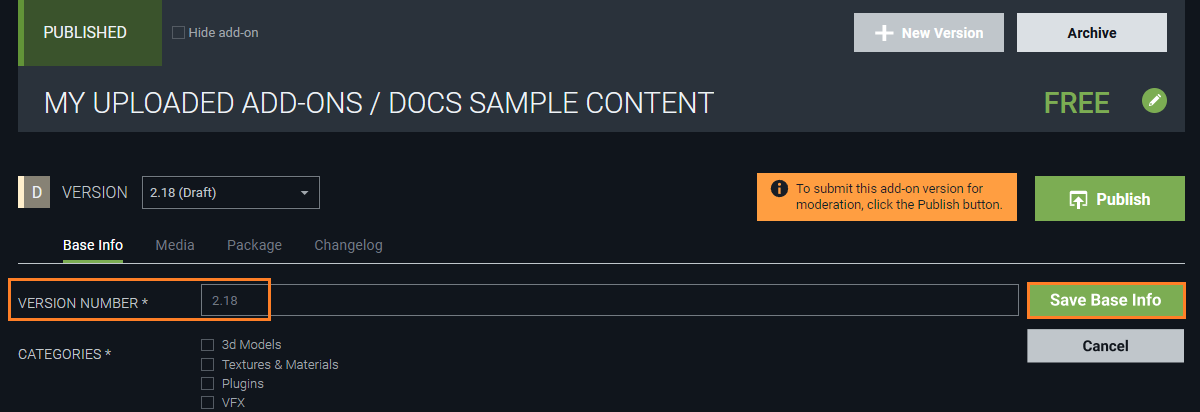
A draft of a new version will be created. Finalize the add-on details as follows.
-
On the Base Info tab, add a new version number, configure other details if necessary, and click Save.

- On the Media tab, add images illustrating changes.
- On the Package tab, upload the newly created package. The previous package or packages will also be available.
If you want to make an add-on suitable for multiple SDK versions, you should first prepare a package for the lowest version (for example, 2.17) and select both versions (2.17 and 2.18). Content for lower SDK version can be automatically migrated to a higher version in UnigineEditor, but there is no backward migration (you can't migrate content from 2.18 back to 2.17). As well, we recommend updating your content packages for every major SDK version to improve performance.
-
On the Changelog tab, click Edit, add info on the version number and all implemented changes.

If you already have info on the previous version(s) here, don’t delete anything, just add new details.

Click Save to save the changelog text.
- As soon as you are ready with the draft, click Publish to submit the created add-on version for approval.
Once your new add-on version is published, users can choose between all available versions and download the one they need.
|
|


