How To Submit a Content Pack
Suppose you have some 3D models (with materials and textures), a cool library of material graphs, or some ArchViz scene (with objects and materials together) that you'd like to share with other users on Add-On Store. This is called a Content Add-On — it is the simplest type of add-on and the easiest one to publish. The whole process is divided into two steps:
- Preparing a package file for your add-on in the Editor.
- Creating an add-on with your package on the Store and submitting it for approval.
Preparing a Package
First, you should put all you want to share into a package (file with the .upackage extension). So, do the following:
- Open UNIGINE Editor.
-
In the Asset Browser choose the root directory (data/) and create a subdirectory named DeveloperNameAddonName (DeveloperName — is your nickname on Add-On Store, and AddonName — the actual name of your add-on. No spaces here!). For example, if you're "Newton" and your add-on is "Apple", you'll have: data/NewtonApple/

- Move all assets that you want to share (3D models, materials, textures, worlds, etc.) to the created directory.
-
In the Asset Browser right-click on this directory (data/DeveloperNameAddonName/) and select Export As Package in the context menu.

-
In the Export Package window that opens, check the Include Dependencies option and select the files to be exported (by default all files are selected).

-
Click Export Package, in the dialog window specify a name and destination directory for your package, and click Save.

Your add-on package (.upackage) is ready to be submitted!
Submitting the Add-On with Your Package
To publish your add-on with the package that you've just created, go to https://store.unigine.com/, click Sign In and enter your credentials.

After logging in, do the following:
-
If you are not a publisher yet, be sure to follow this guide first to become one. Otherwise, proceed to the next step.
-
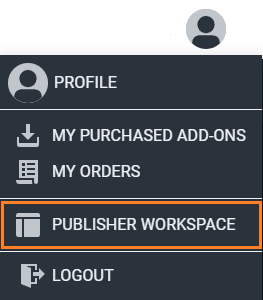
Go to Publisher Workspace by clicking on your avatar at the top menu bar and selecting the corresponding option:
- In the Publisher Workspace, click + Create Add-On.

- Fill in the form: make sure to select suitable categories (e.g., 3D Models and Textures&Materials) and to choose the Community required license. As soon as you’ve finished, click Create Add-On.

-
On the Add-On Draft page that opens, go to the Media tab to add the cover image and other related media.
You have to add at least one image or video, otherwise the add-on won’t be published!
Add a media file by clicking (+) in the corresponding section and choosing a file from your computer or specifying a link to a YouTube video.

- Go to the Package tab, click Add Package to add the necessary *.upackage file.

In the pop-up window fill all required fields: click Select Uрackage and choose the package that you've created earlier (*.upackage file), select the appropriate SDK version and Operating System, and set Source Code to No Code. Click Upload Package to add it to the add-on.

Your add-on can have multiple *.upackage files for different Operating Systems and SDK versions.
- Click Publish to submit your add-on for approval (the procedure is called Moderation).

-
Wait for moderation results. This is a mandatory verification procedure that takes some time before publication. After reviewing your add-on UNIGINE team either approves it or provides feedback for resubmission.
If you decide to change something in the add-on sent for moderation, click Withdraw and it will return to the Draft status. After making changes, send it for moderation once again.

As your add-on is approved it is published automatically and you get an email notification. Congratulations!
|
|